

Halo Infinite multiplayer level design series: DEADLOCK | by Ketul Majmudar | Dec, 2023
[ad_1]


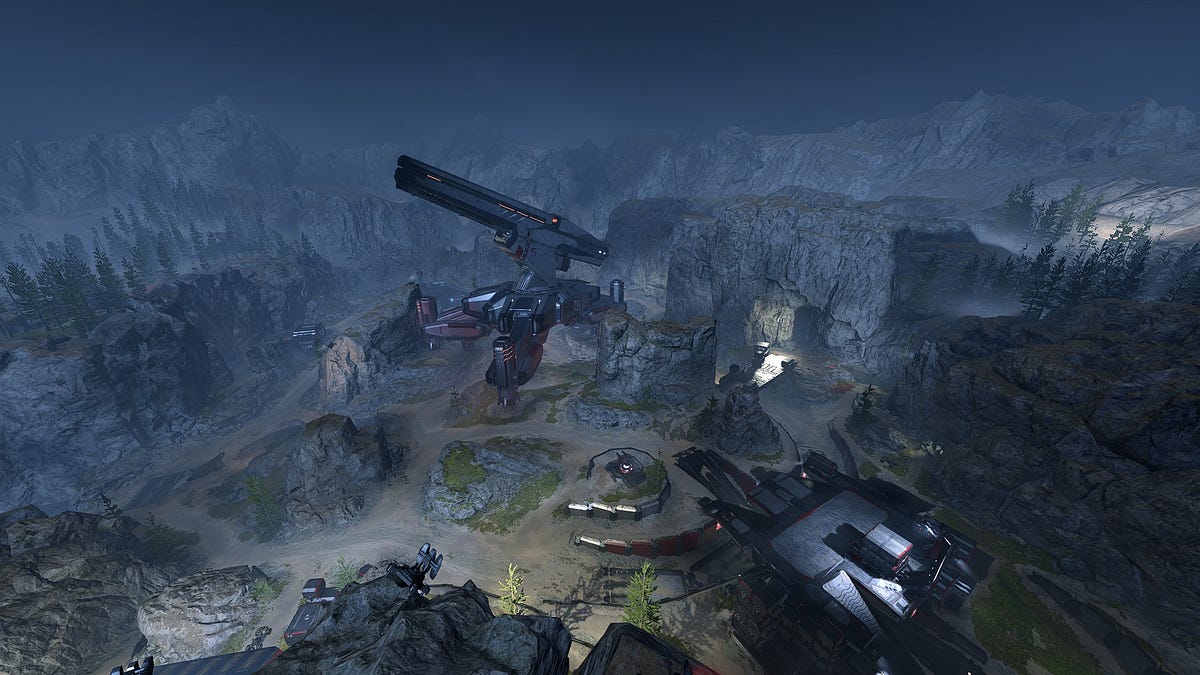
Deadlock is a relatively open map with long sight lines focusing on player aim and precision. Turrets and long range weapons are important part of any teams strategizing to dominate in this map. Along with several long range weapons, there are also camping spots available with incredibly long sight lines that lead to a lot of interesting emergent gameplay.


Unlike most other Halo multiplayer maps we have seen so far, the time of day for this map is set to nighttime. Not only does this provide variety to the atmosphere and help with the unique theming of this map but it also affects the design of the map by reducing visibility throughout the map. Nighttime makes it harder for players to be seen thus providing good balance to long range weapons and engagement opportunities.
In the adrenaline-fueled world of Halo, strategy is key, and the Deadlock map provides an intricate battlefield with limited camping spots. Elevated terrain and specific man-made structures offer advantageous positions, allowing players to survey the landscape and target enemies from a distance using long range weapons. To balance the opportunities and safety of these spots, there are multiple entry and exit points to these areas making it pretty easy to sneak up on players using these camping spots.


A glance at the map reveals a predominantly flat plane, interspersed with vertical rocky and man-made structures. These structures break the monotony, creating a warzone atmosphere reminiscent of trenches.
These structures are not too wide out on the plane creating a lot of small and large path loops around the map. This creates an area under the central canon with shorter sight lines. These loops, both wide and narrow, offer opportunities for players to confuse and flank opponents.
The vertical structures not only enhance the map aesthetically but also play a crucial role in strategic gameplay.


Narrow and wide passages cater to different vehicles, adding a layer of complexity to vehicle navigation. As we saw in the previous section, that vertical structures create wide as well as narrow pathways. These wide paths facilitate substantial vehicle gameplay, while narrower paths facilitate swift movement for players on foot or smaller vehicles. The wide path loop that goes around the map is the most viable path for fast vehicles like the Ghost or medium sized vehicles like the Warthog, since the other paths are either too narrow or curvy to effectively navigate these vehicles. The only viable vehicle on the narrower paths would be the Mongoose which would be the most effective for quickly getting to the other side of the map while avoiding the snipers using trench like narrow paths.


Just like some of the previous Halo maps we have checked out, bridges play a crucial role in Deadlock, creating crisscross pathing on the map between the lower and upper levels. This architectural choice gives more meaning to the verticality introduced by rocky structures, adding depth to the gameplay experience by provide more pathing and camping options to the player.
For a more in-depth look on how bridges enhance gameplay in Halo maps, check out the section on Bridges in my previous article of the series based on the Bazaar multiplayer map. You can check that article here: Halo Level design series: Bazaar.


Amid the chaos, Deadlock provides refuge spaces — moments for players to catch their breath. These spaces, often enclosed caves and hangars housing vehicles, offer brief respite. However, players must tread carefully, as these areas with short sightlines can quickly become dangerous as large team maps mean more players can frequent these refuge spaces.
We have already looked at the importance of refuge space in Halo maps in another article in this series. You can take a look at that article here: Halo Level design series: Behemoth.


In the ever-evolving landscape of Halo, Deadlock stands as a testament to strategic design for open maps, offering a diverse terrain that challenges players to adapt and conquer. Understanding the nuances of this map and mastering the different opportunities that the map presents can be the key to victory in the intense battles that unfold within its limits.
[ad_2]
Source link

")